The 11.1.2.4.210 patch set update for FDMEE adds new Hybrid functionality to allow integration with either Oracle FCCS or Fusion Cloud, the readme for the PSU has the following information:
“FDMEE can be used as a primary gateway to integrate data between on-premise and the cloud based Financial Consolidation and Close Cloud (FCCS) and the Fusion GL Cloud Balances applications. This feature allows EPM customers to adapt FCCS and Fusion GL Cloud Balances deployments into their existing EPM portfolio. You might use the integration to import data from existing on-premise ERP applications, or synchronize data between FCCS applications or Fusion GL Cloud Balances and on-premise applications.”
FDMEE 11.1.2.4.210 now supports these type of hybrid integrations:
- On-premise ERP applications from supported source with Oracle Cloud
- On-premise EPM applications with Oracle Cloud
- Oracle Cloud with on-premise EPM applications
- Oracle Cloud with EBS/Peoplesoft GL
- Oracle Cloud with on-premise external sources using custom application
- Oracle Fusion Financials Cloud (GL) with on-premise EPM application
- Oracle Financial Consolidation and Close Cloud applications with on-premise applications
If you have not already read my hybrid posts then I recommend taking a look, the first part is a must in order to get going with hybrid integrations.
Part 1 - Necessary configuration to get up and running with the hybrid functionality.
Part 2 - Loading data from an on-premise EPM application to a PBCS application and looking at what happens behind the scenes with the REST API.
Part 3 - Exporting data from a PBCS application and loading it into an on-premise EPM application with focus on what is happening with the REST API.
The aim for today is to export data from an on-premise planning application and load that into a FCCS application.
As usual I am going to try and simple as simple as possible and I have created a planning form to show the data which will be exported.

To be able to get anywhere the FCSS application has to be added as a target.

After selecting the cloud option credentials are entered.

From 11.1.2.4.210 there is a new option of “Consolidation” when selecting the target application.

As long as the FCCS application is available as a target in the cloud Data Management then it should be displayed.

The application name is returned by making a call to a REST call, a GET request is made to the following URL:
https://<cloud_instance>/aif/rest/V1/applications
The response contains the application name.

Once the application has been selected then REST comes into play again to return the dimension information
A GET request is made to:
https://<cloud_instance>/aif/rest/V1/applications/<app_name>
The response contains information about the dimensions in the application.

Now that the dimensions are known the dimension details can be populated in FDMEE.

You will notice that in the target application summary there is an option to “Refresh Metadata” and “Refresh Members”.

I will get to refreshing members later but say you add a new dimension in the target FCCS application then you would want this to be synchronized back to on-premise FDMEE, this option refreshes data management in the cloud and then pushes this down to FDMEE.
Behind the scenes it is all done again with REST, if you click the refresh metadata button then an FDMEE process will be executed.
In the on-premise process details you can the steps that have been carried out.


In data management in the cloud you will see a process has been run to extract the FCCS metadata and update the target application.

To update the metadata in data management a post request is made to a REST resource.

Once this process has been successfully completed then the same REST resource when adding the target application is called again.
https://<cloud_instance>/aif/rest/V1/applications/<app_name>
This will extract the dimension information from DM in the cloud and update the target on-premise FDMEE application.
In the target FCCS application options they contain the cloud credentials and default FCCS system members which are used when loading to the FCCS application.

The “Load Type” property has two possible values.

For today I am only going to be covering the standard “Data” load type, possibly in the future I will go over loading journals.
These load type values can be overridden at data load rule level.
From this point it is the same process you would follow in FDMEE to load to a target on-premise EPM application.
An import format is created setting the source as the on-premise planning application and the target the FCCS application.

The source planning dimensions are then mapped to the target FCCS dimensions.

A location is created and the newly created import format is selected.

By default, the FCCS currency member “Entity Currency” is automatically added for the functional currency.

The same goes for the Consolidation system member “FCCS_Entity Input” which is generated for “Data Value”

On to the data load rule, the FCCS scenario to load to is selected, the scenarios already match to what I had configured in the category mapping.
The source and target essbase cubes were selected, I hope that soon they are just going to be called cubes instead of causing confusion with cube and plan type.

Next filters were added to define the source intersection to extract data from, this is defined to match the data in the form that I showed earlier.

In the target options of the rule there is the option to override the application level load type.

Just like at the target application level the value can be set to either “Data” or “Journal”.
Moving on to the mappings, for the source planning application members there is an option to refresh members.

For the target FCCS application members there is no button available to refresh members and initially the member list view will be empty.

The “Refresh Values” is not selectable in the mapping UI.

This is because currently it is not possible to refresh members at a dimension level for cloud application and it has to be done at target application level.

Selecting “Refresh Members” will launch a new process.
In process details there will be a “Refresh Members From Cloud” process.


The steps first involve refreshing the members from FCCS to data management in the cloud
There is an equivalent process in data management.


Once again the refreshing member in the FCCS data management cloud instance is achieved using a REST resource.

Once the process has completed successfully the member information is pushed down from data management to on-premise FDMEE using REST.
A GET request is made for each dimension in the target application using the following URL format.
https://<cloud_instance>/aif/rest/V1/applications/<app_name>/dimension/<dimension>

After all dimensions have been processed the members will be available in the FDMEE mappings member selector.

There will be automatically created mappings for the FCCS system members in the “Data Source”, “Movement” and “Multi-GAAP” ” (if enabled) dimensions, these member definitions originate from the target application options which were shown earlier.

Now the rule can be run and I will start off by only running the import in the workbench.

The steps taken are exactly the same as running an on-premise EPM to EPM integration.
The data will be extracted from the source Essbase application based on the filters in the load rule to a text file, an Essbase DATAEXPORT calculation script is generated to export the data which means currently it is only possible to extract numerical data from a planning application, maybe a future release will provide the ability to extract all data types.
The export file is then loaded into the FDMEE relational database and source members mapped to target members.
So now on to the export.

Depending on the amount of data it is probably best to run in offline mode.

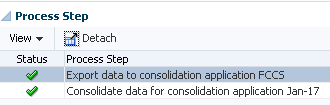
The export completed successfully and process details give a very high level summary to the steps undertaken.

So what is happening behind the scenes, first of all data is extracted from the FDMEE relational database to a text file, this can be seen in the process log.
INFO [AIF]: Creating data file: \\fileshare\EPMSHARE\FDMEE\outbox\FCCS_1869.dat
INFO [AIF]: Data file creation complete
What is interesting in the log is details on the method that will be used to load data to FCCS.
DEBUG [AIF]: Overrode info.loadMethod for the available mode: OLU
So by default the way data is loaded with FCCS is by using the Outline Load Utility, this differs from loading to PBCS where it is possible to select “Numeric Data only – File” in the FDMEE data load rule which means data will be loaded directly to the Essbase database using a load rule
Alternatively, for PBCS the “All Data Types” load method can be selected which means the Outline Load Utility will be used to load data through the planning layer
If you open the exported file before it is loaded to FCCS you can see that it is the format required for the OLU.
The next steps in the log show the exported file is then uploaded.
INFO [AIF]: Uploading data file to PBCS: \\fileshare\EPMSHARE\FDMEE\outbox\FCCS_1869.dat
INFO [AIF]: Completed data file upload to PBCS.
It looks like the same code is used for PBCS as even though it is being uploaded to FCCS it is logged as PBCS.
The file is uploaded using a REST resource which I covered in a previous post.
Another REST resource is called upon to load data from the uploaded file, an example being:

The file is then loaded to the FCCS application using the outline load utility.
Outline data store load process finished. 3 data records were read, 4 data records were processed, 4 were accepted for loading (verify actual load with Essbase log files), 0 were rejected.
INFO [AIF]: Number of rows loaded: 3, Number of rows rejected: 0
It is also worth understanding what happens if invalid rows of data are loaded, as a test I added another account to the source filter in the data load rule and mapped it to mapped it to a member that does not exist in the FCCS application.

The account member “Securities” does not exist in the target application and running the export causing the FDMEE process to fail.


Looking at the process log shows that the correctly mapped data did actually load and the new incorrectly mapped record of data was rejected.
Fetch of Driver Member "Securities" failed.
Outline data store load process finished. 4 data records were read, 5 data records were processed, 4 were accepted for loading (verify actual load with Essbase log files), 1 was rejected.
INFO [AIF]: Number of rows loaded: 3, Number of rows rejected: 1
The full details of the record that was rejected is not displayed in the log but it does contain the invalid member.
Anyway I created a form in FCCS to confirm the data had loaded successfully and test out drill through.

If create drill regions have been enabled in the data load rule then you should be able to select “Drill Through to source”.

This opens a new browser window which redirects to the on-premise instance of workspace passing in the drill through details.
Once authenticated the FDMEE Drill Through Summary page will be displayed.

I am going to leave it there for today and in the next part I will reverse the process and extract data from an FCCS application and load into an on-premise EPM application.


